
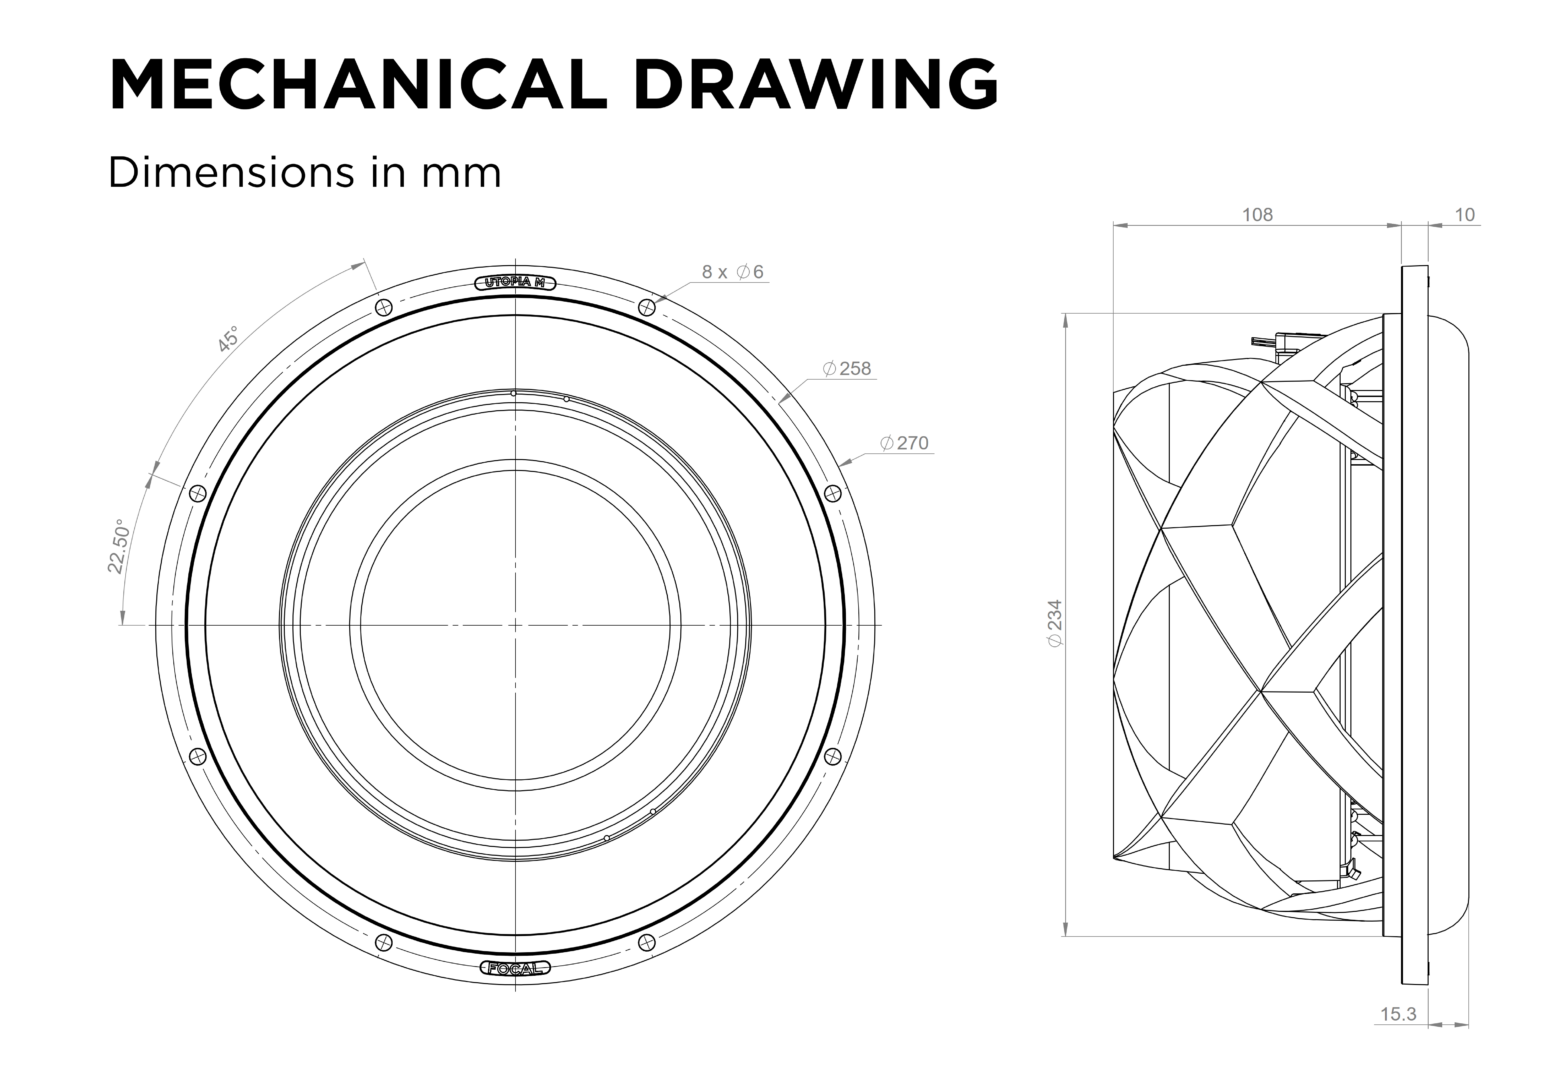
This is work-in-progress. Currently designing down-firing passive subwoofer enclosure. The design files are placed here since sharing 3D drawings via WhatsApp with the builders (to get quotations) can be difficult.
Request for Quote
Scope: Join and glue the cut MDF panels, including bracing
Finish: Matte black and gloss piano black (please quote both)
Note: Footers and binding posts will be self-purchased
Quantity: 2 pcs required
3D Animations
Enclosure Before Fillet
Enclosure After Fillet
Enclosure with Footers
Overall Dimensions
Width 320mm
Depth 320mm
Height 305mm (excluding footers)
Gross Volume 19.2 liter
Net Volume 15 liter
MDF thickness: 3/4″ for all except 1″ for inner driver mount
Note: Will be using SVS SoundPath Isolation Feet
Edge Finish
For Bottom Outer and Top Panels, use Router to round the edges before assembly.
For the 4 vertical edges, use Router to round the edges after enclosure assembly.
Please use ¼” or 6mm radius router corner rounding bit shank with bearing.
Enclosure Design
You can view the drawings below or download the whole enclosure design document above at once.
Bottom Outer Panel
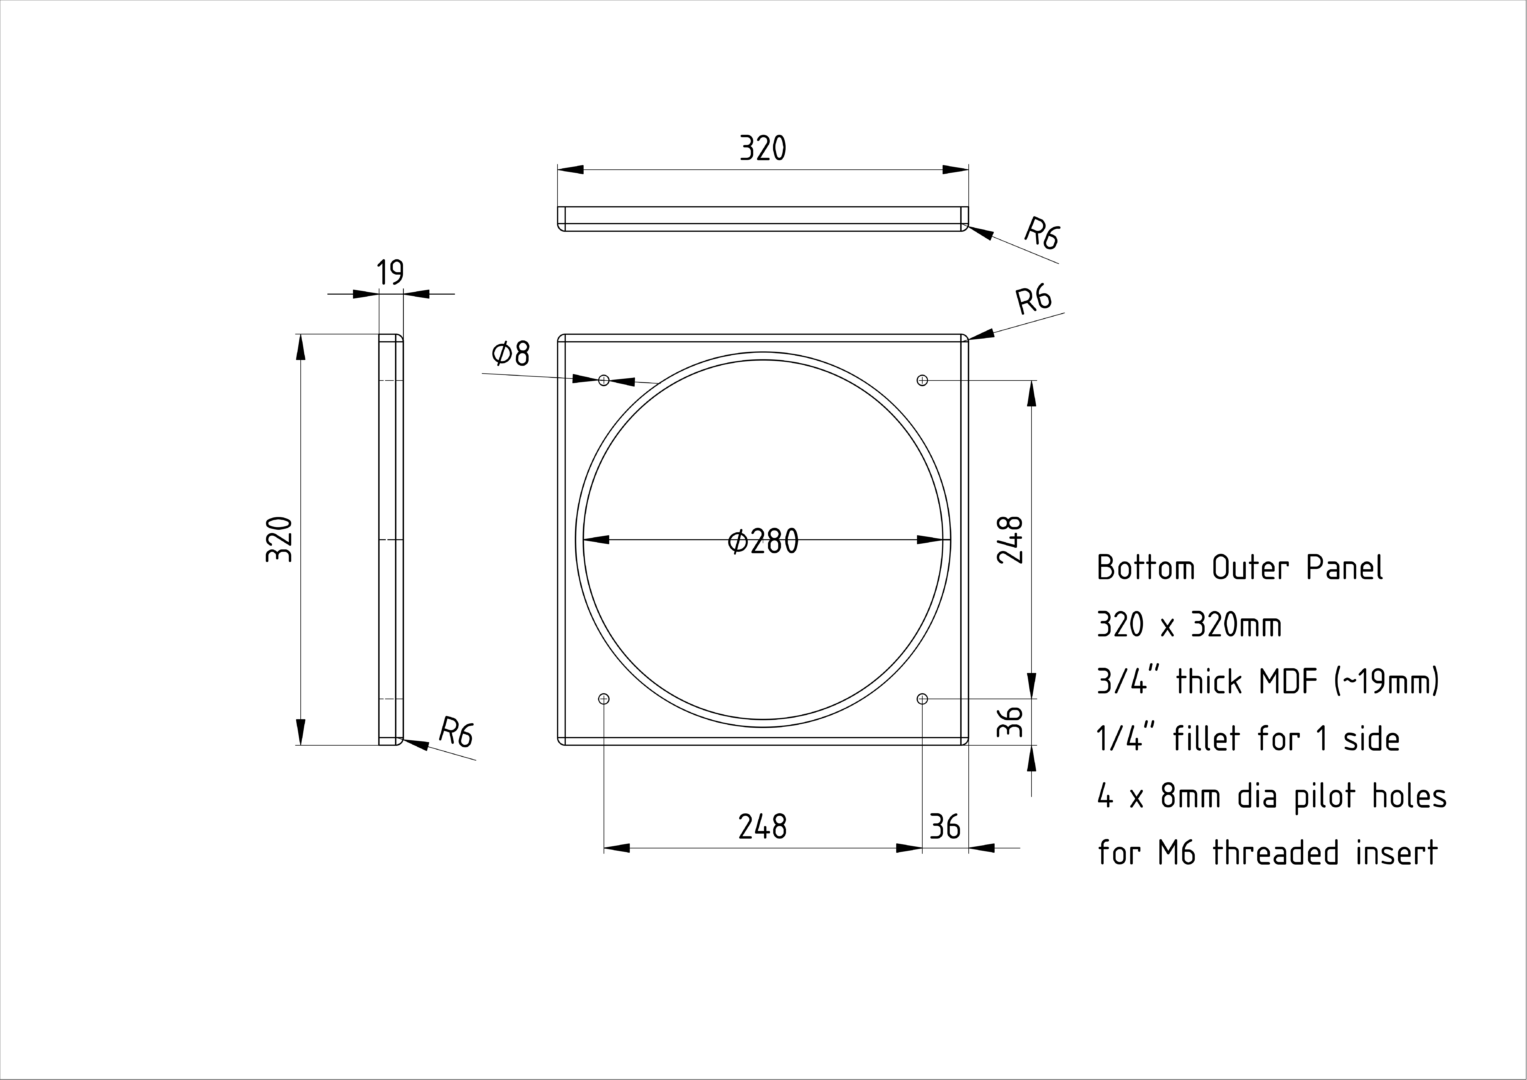
M6 threaded inserts for footer mount shown below, inserted into the 4 holes of Bottom Outer Panel.
Bottom Inner Panel
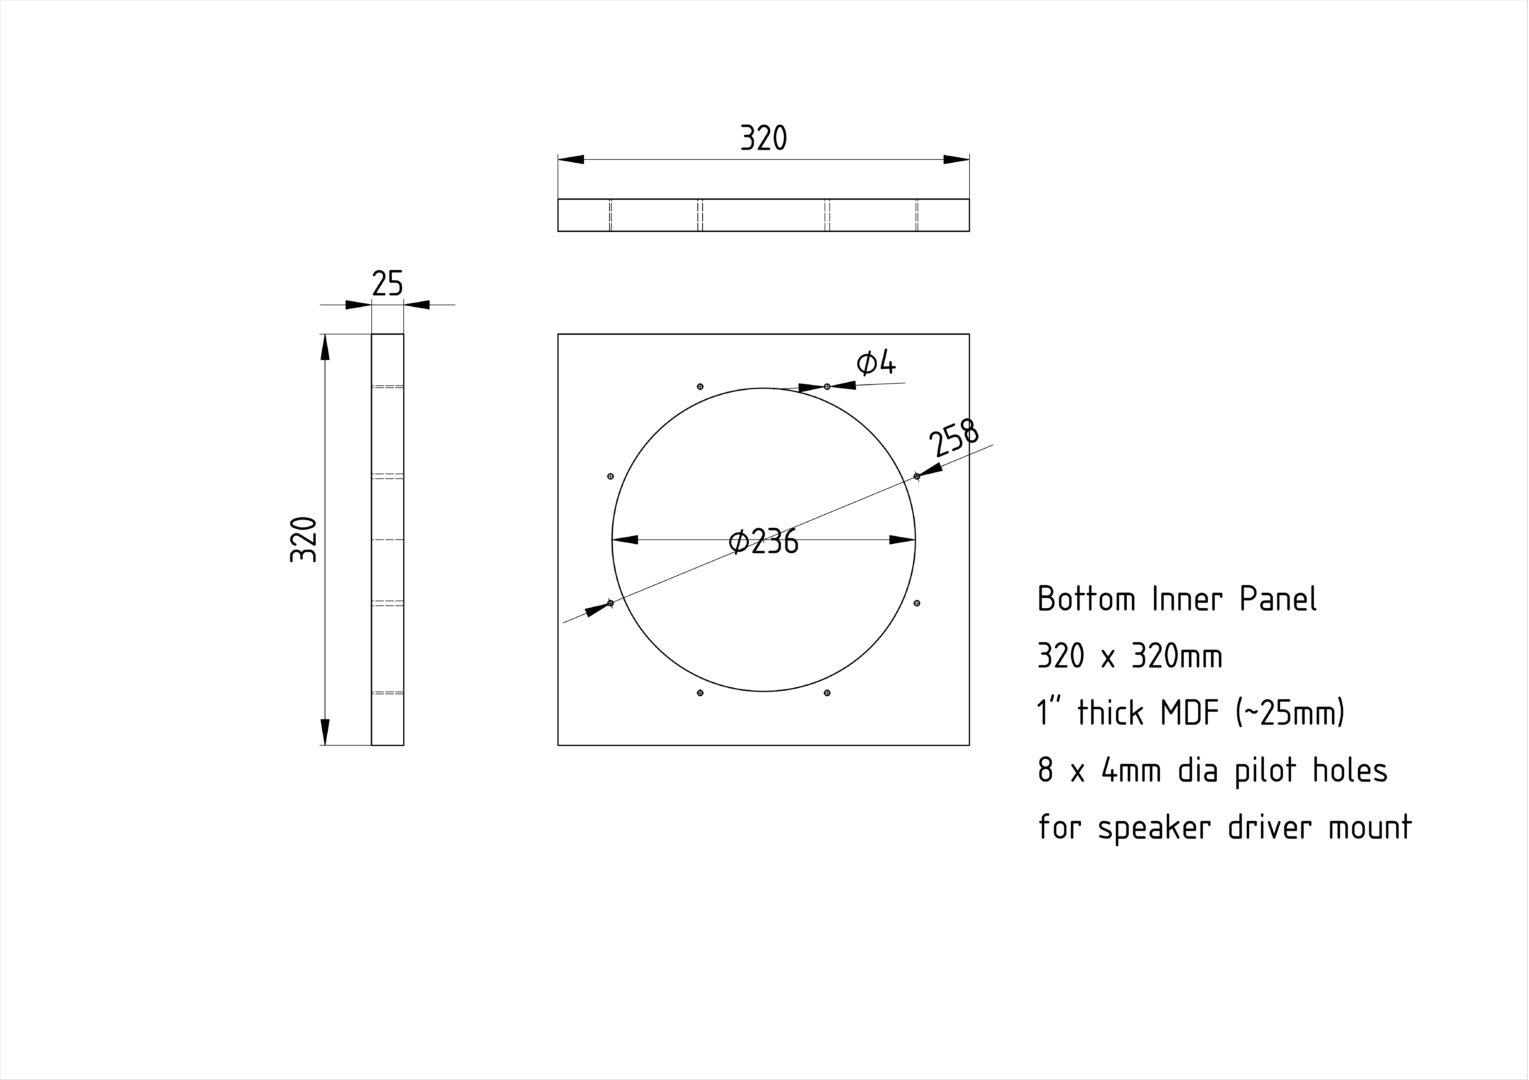
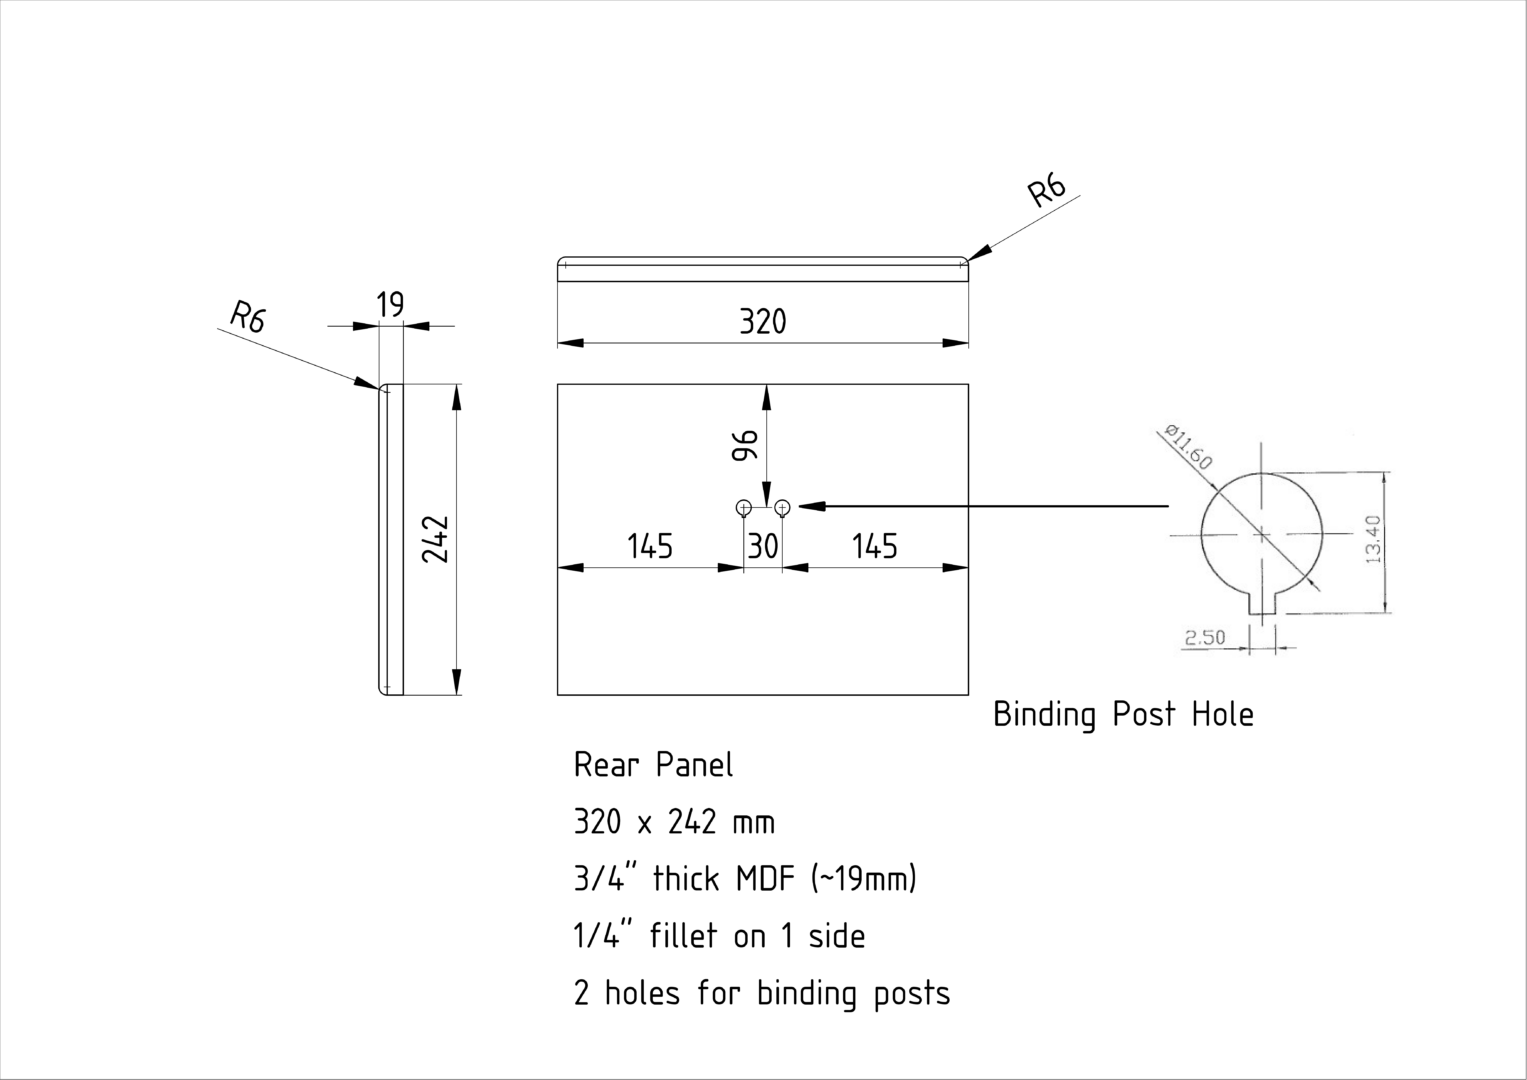
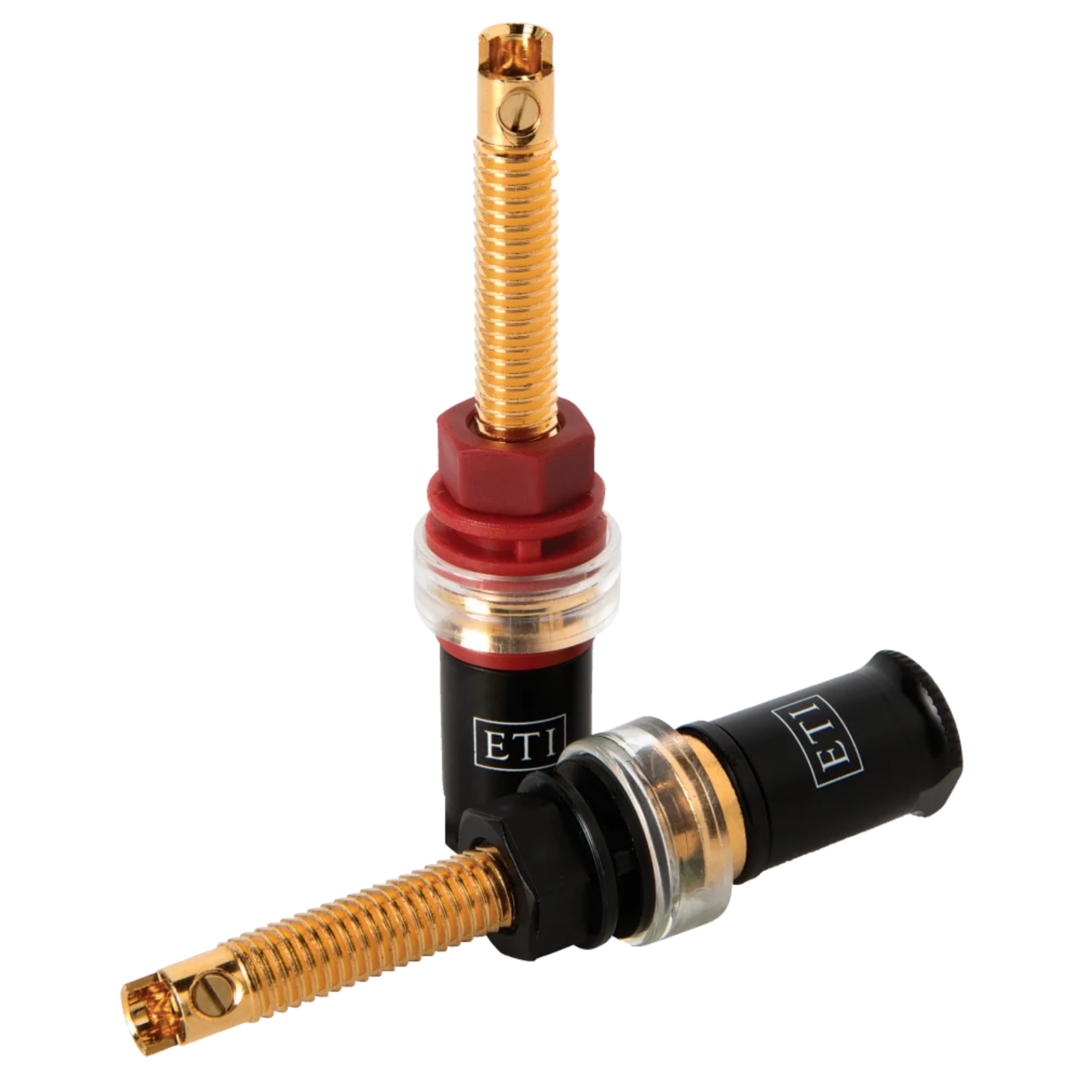
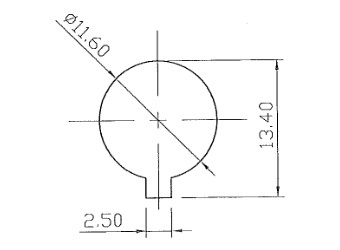
Rear Panel (with binding posts holes)
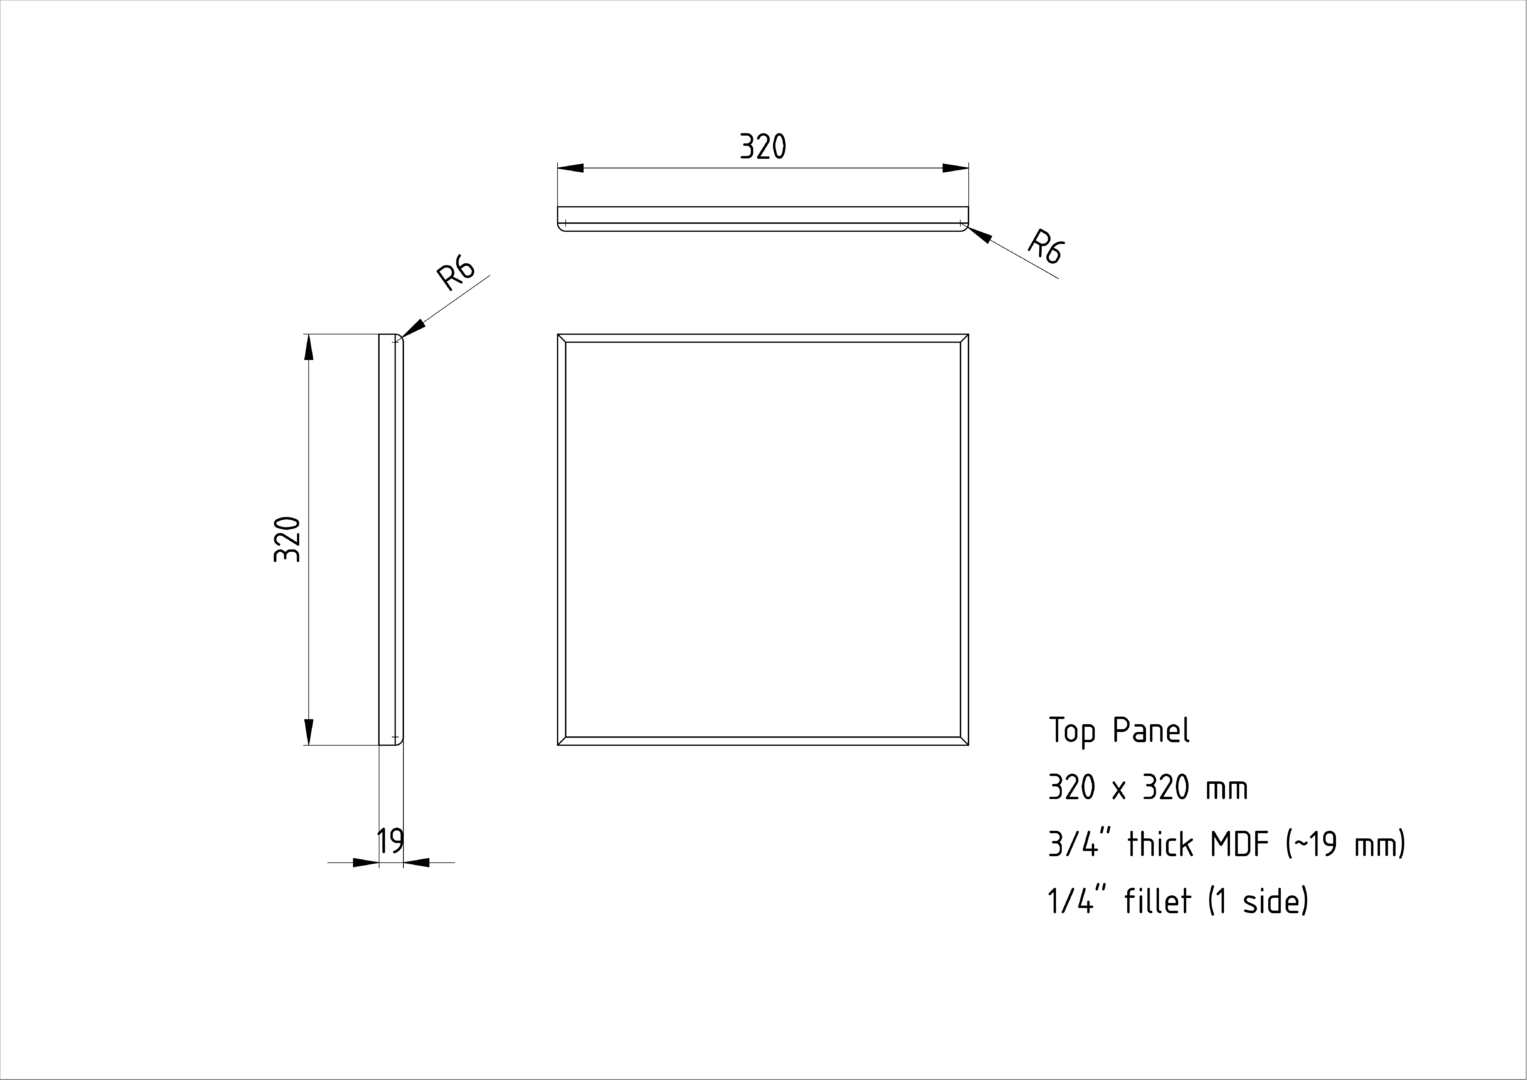
Top Panel
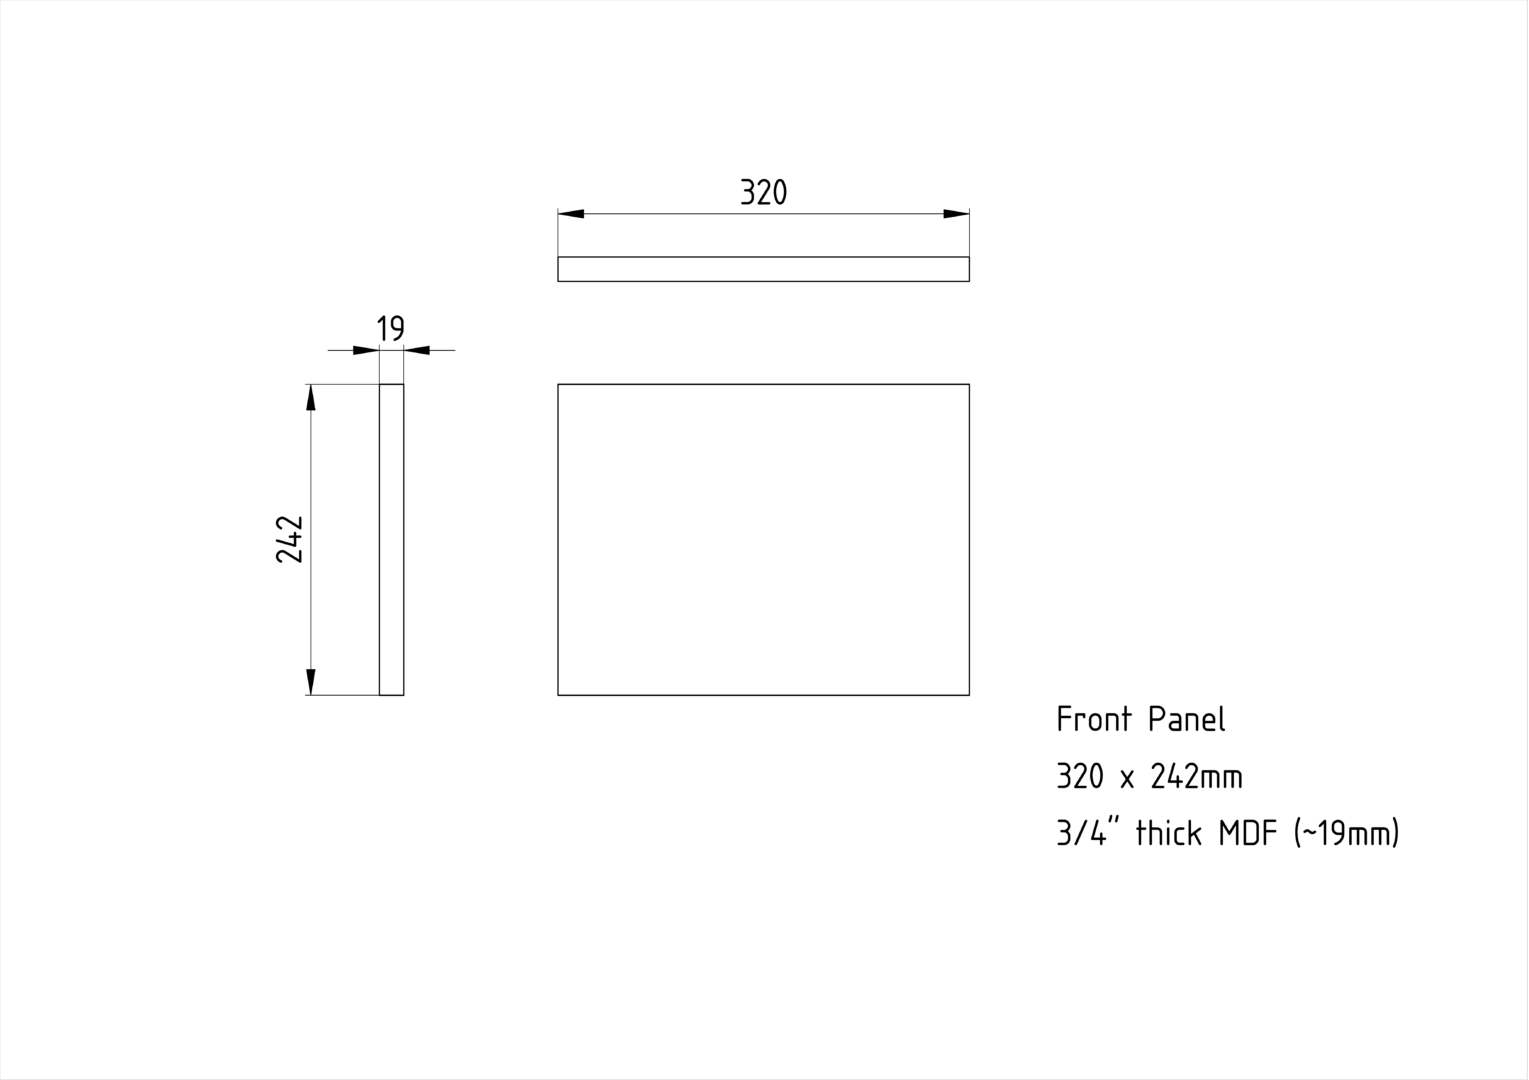
Front Panel
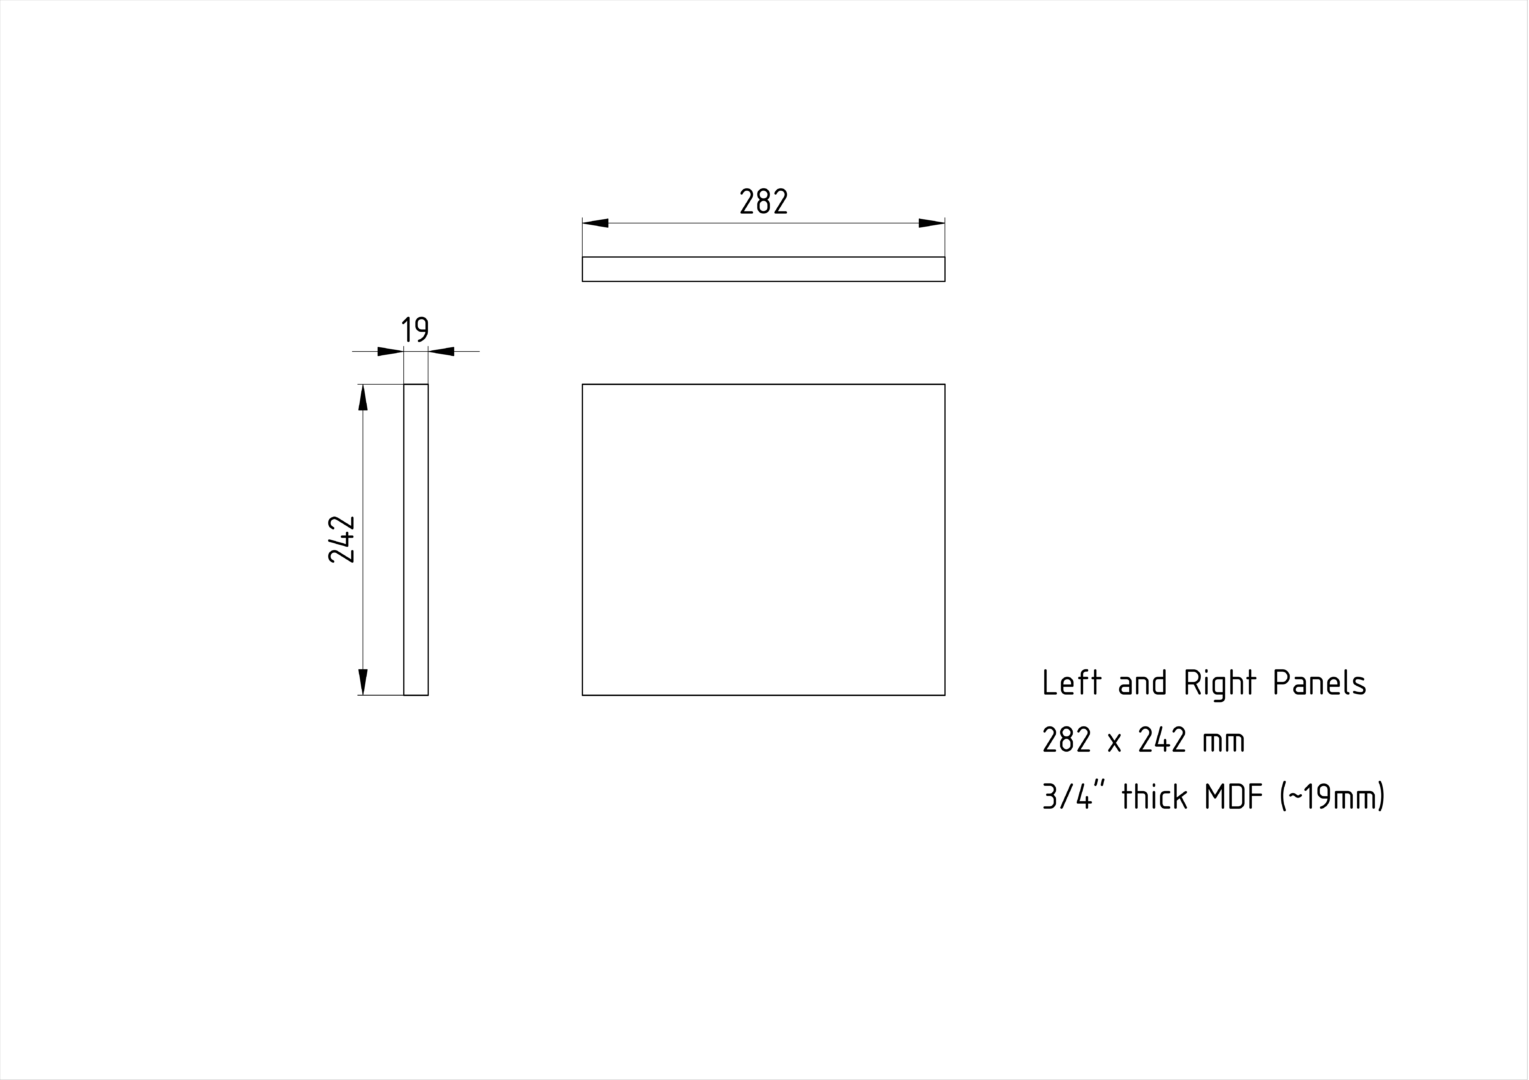
Left and Right Panels
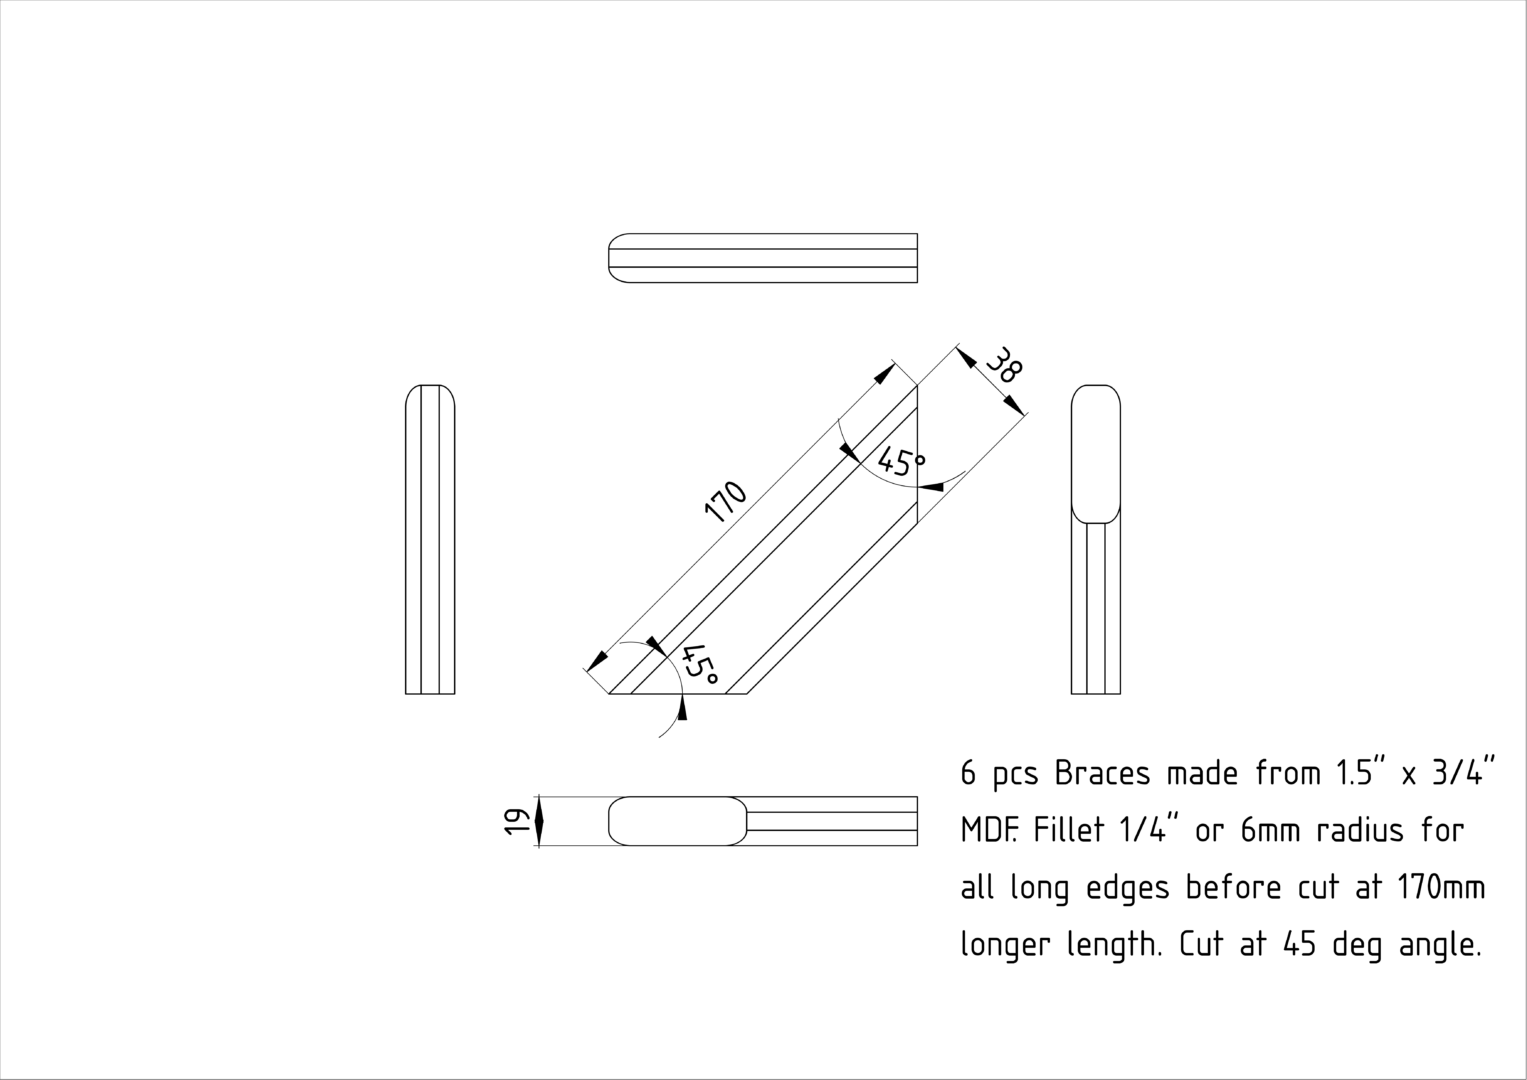
Bracing
There are 6 bracing panels to be glued inside. These are to enhance rigidity of the panels’ center. The 1.5″ x 3/4″ panel’s 4 edges need to be rounded with 1/4″ or 6mm radius router corner rounding bit shank before cut at 45 degrees angle.
The earlier 3D drawings are not showing rounded braces. Rounding of the braces’ long edges is required to reduce air turbulence inside the enclosure.
Each brace is positioned at the center within the internal net width.
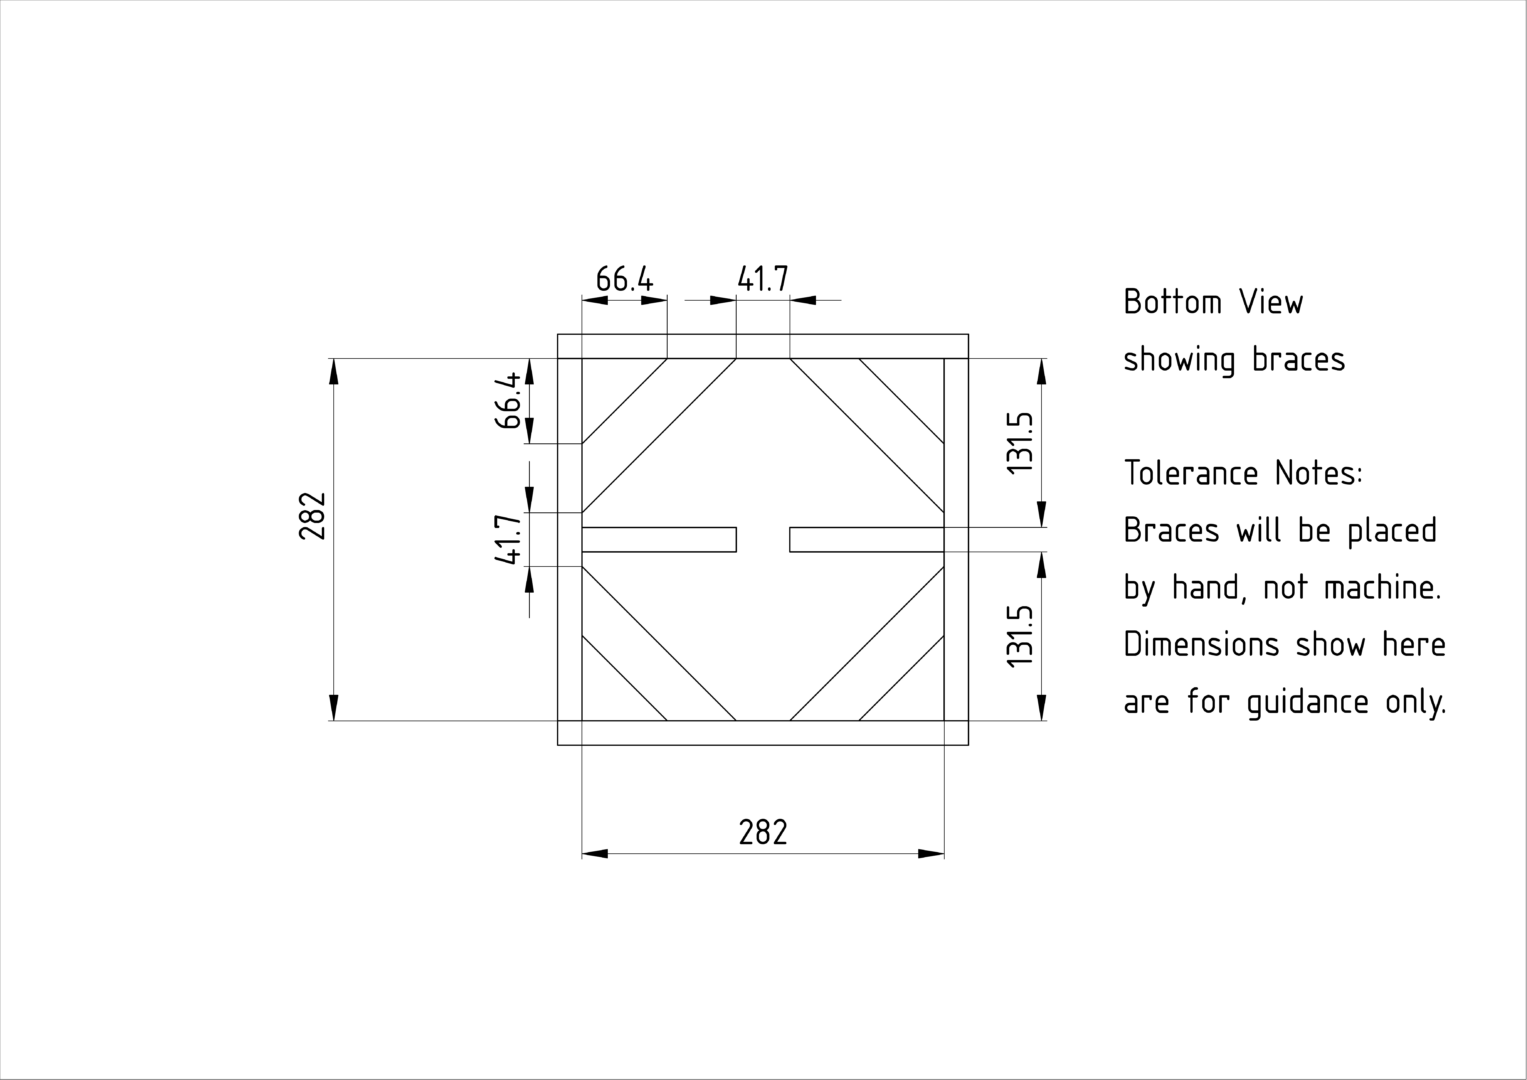
Additional Bracing
This is to enhance rigidity of the top panel since 10-15 kg of weight will be put on top of the subwoofer.
The reason the braces need to be broken into 2 pcs is that the subwoofer enclosures have been assembled. They are designed as interlocking pieces to ease inserting them into positions.
After 2 pieces are assembled, they look like 1 piece.